
Suzuki Hustler Restoration
This is a 1971 Suzuki T 250 Hustler we dismantled and re-built to show the range of our services and quality of our workmanship.
Before

After

Restoration Process
The first part of the process was to completely dismantle the whole bike and inspect all the parts. Where possible we aimed to keep as much of the bike original as possible.
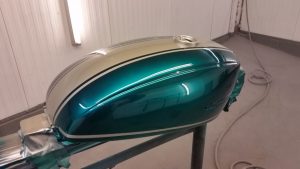
The frame was sent off for powder coating, an engine for re-building and fuel tank for painting.
Brightwork such as all the Chrome work, Alloy polishing, Zinc plating and Vapour blasting was completed by ourselves. We also repaired some of the specialist pieces such as the clocks which you can see under projects and the saddle we recovered. The seat base was repaired by our fabrication company Trimax Fabrications LTD.
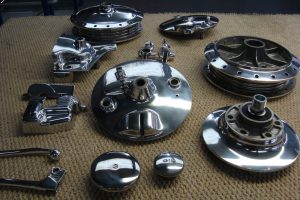
These were some of the Alloy parts from the restoration that was re-polished.
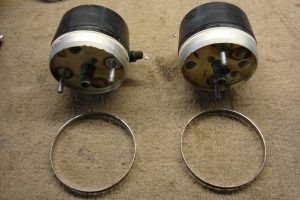
We re-chromed the rims and then the Alloy hubs were sent off to our wheel builder before being reunited.

Parts such as the rear sprocket, wheel spindles, chain adjusters, spokes and all the small nuts and bolts were Bright Zinc plated. Before re-assembly such as the rear sprocket assemble shown in this picture.
The clocks were machined to remove the corroded bezel and then re-chromed. The bodies were painted in a special plastics paint and the lens re-polished to remove any scratches.
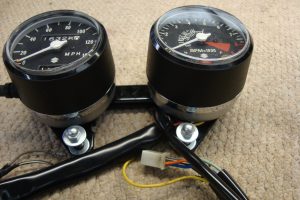
Once assembled the clocks were re-wired ready for assembly back onto the bike..
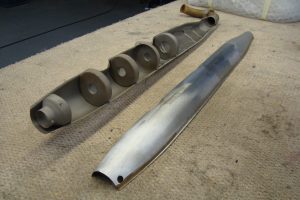
Silencers were just one of the many parts that needed re-chroming, but these silencers were particularly bad due to the extensive dents. the only option was to split them to access the dents and repair any broken or damaged baffles. You can see them in more detail under our projects section.
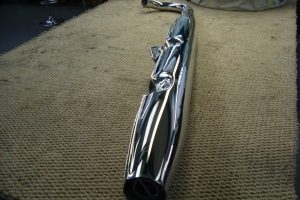
Once repaired were were able to re-weld the seams and re-chrome the silences preserving all the original markings.
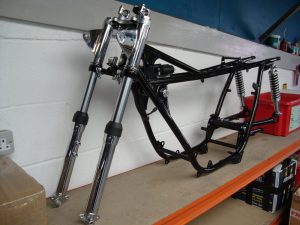
After re-building the forks with our newly hard chromed and ground fork legs. Were were able to re-assemble in our newly powder coated frame.
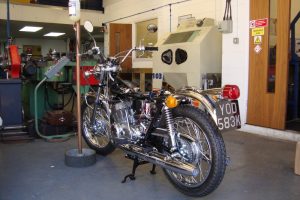
Wheels, engine, wiring, exhausts were finally put into the frame to make a rolling chassis. Once fed from a drip feed our newly rebuilt engine it burst into life and sounded fantastic!
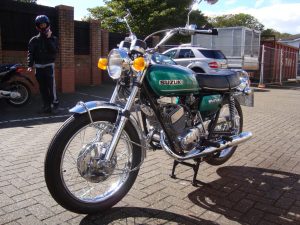
This is a small snap shot of some of the parts and restoration processes we embarked on to restore this 70s classic. Which now stands in our main reception to show customers what can be achieved. The finishes we have put back into this bike is exactly original and I should know I HAD ONE BACK IN THE DAY!
It’s a good guide to show our customers the difference in some of the finishes so they can make an informed decision as to what is right for there vehicle.